
Of all the vegetables you can grow in a backyard garden, nothing quite matches the satisfaction of biting into a sun-warmed tomato you grew yourself. The flavor difference between a homegrown tomato and a supermarket one is so dramatic that many gardeners say growing tomatoes is what turned them into serious gardeners. This complete guide covers everything you need to know — from choosing the right varieties and starting seeds to solving problems and harvesting an abundant crop season after season.
Why Grow Your Own Tomatoes?
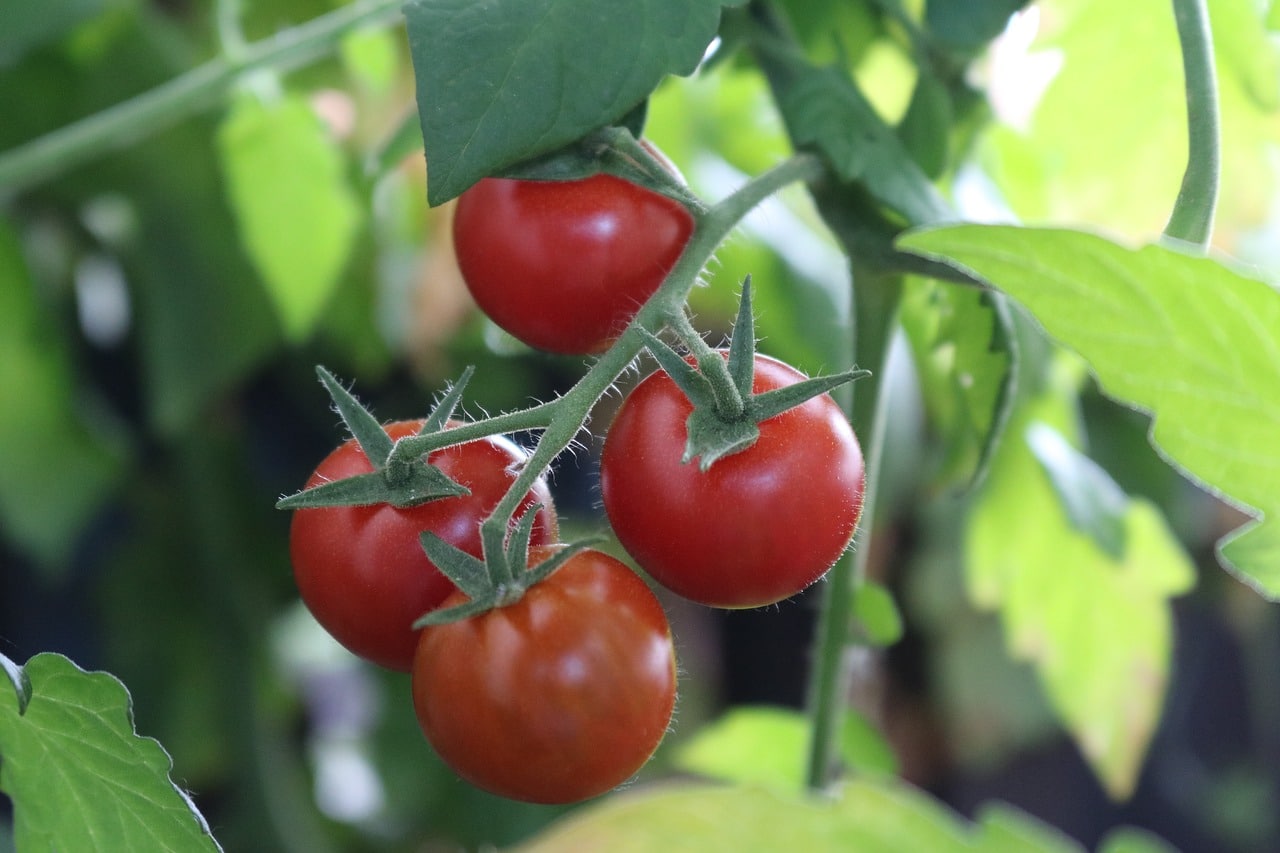
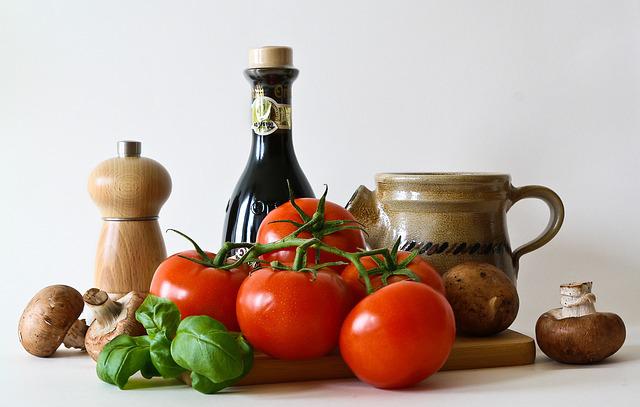
Ask any experienced gardener why they grow tomatoes and you’ll get the same answer every time: the flavor. A tomato ripened fully on the vine in your own garden and eaten the same day it’s picked is a completely different food from the uniform, pale, flavourless spheres that dominate supermarket shelves. The difference isn’t subtle — it’s dramatic, almost shocking if you’ve never experienced it before.
Commercial tomatoes are bred for yield, uniformity, durability during shipping, and long shelf life. Flavor is a distant secondary consideration. Home gardeners have none of these constraints. You can grow varieties selected entirely for flavor — heirlooms with extraordinary complexity, cherry tomatoes that burst with sweetness, large beefsteaks with rich, meaty flesh — varieties that would never survive the commercial supply chain but are spectacular in a home garden.
Beyond flavor, growing tomatoes is deeply satisfying in a way that few other garden plants match. They’re responsive to care — the more attention you give them, the better they produce. They reward observation and learning. And they’re generous: a single well-grown tomato plant can produce 10-15 pounds of fruit over a season, providing weeks of fresh tomatoes plus enough surplus for sauces, preserves, and sharing with neighbors.
Tomatoes are also among the most versatile garden plants, thriving in raised beds, containers, in-ground plots, and even on balconies. They grow in a wide range of climates. They respond to organic growing practices beautifully, producing their best flavor in rich, well-composted soil without synthetic inputs. DIY Organic Gardening: The Ultimate Beginner’s Guide
And yes — they do require some attention and knowledge. Tomatoes are not a completely carefree crop. But the investment of learning to grow them well pays off in harvests of extraordinary quality that will spoil you for store-bought tomatoes forever.
Understanding Tomato Types: Determinate vs Indeterminate
Before choosing varieties, it’s important to understand the fundamental distinction between the two main growth habits of tomato plants.
Determinate Tomatoes
Determinate tomatoes (also called “bush” tomatoes) grow to a genetically predetermined size — typically 3-4 feet — then stop. They set all their fruit within a relatively short window (2-3 weeks), ripen it more or less simultaneously, and then their productive life is largely over.
Best for:
- Gardeners with limited space
- Canning and preserving (concentrated harvest is convenient)
- Container growing
- Gardeners who want a defined harvest period rather than continuous picking
Popular determinate varieties: Roma, Celebrity, Rutgers, San Marzano, Glacier
Indeterminate Tomatoes
Indeterminate tomatoes grow continuously throughout the season, setting and ripening fruit progressively from early summer until frost kills them. They can reach 6-10 feet or more in height and require sturdy support. In return, they provide continuous harvest over a much longer period — weeks or months of fresh tomatoes rather than one concentrated flush.
Most of the best-flavored and most beloved tomato varieties — including virtually all heirloom varieties — are indeterminate.
Best for:
- Continuous fresh eating through the season
- Maximum total yield
- Most heirloom and gourmet varieties
- Gardeners who want tomatoes over a long harvest window
Popular indeterminate varieties: Brandywine, Cherokee Purple, Sun Gold, Black Krim, Mortgage Lifter, most cherry tomatoes
Pro Tip: Most experienced home gardeners grow primarily indeterminate varieties for continuous fresh harvest, supplemented by one or two determinate paste tomato plants for making sauce. This combination provides the best of both worlds — daily fresh tomatoes for months plus a good batch of paste tomatoes for preserving.
The Best Tomato Varieties to Grow
With thousands of tomato varieties available, choosing what to grow can feel overwhelming. Here are the categories and standout varieties that consistently delight home gardeners.
Best Heirloom Tomatoes for Flavor
Brandywine — the gold standard of heirloom tomatoes. Large, pink-red, deeply flavored fruits with a rich, complex, almost wine-like taste. Somewhat demanding to grow but the flavor is extraordinary. Pink Brandywine is the most common; Yellow Brandywine is equally delicious.
Cherokee Purple — one of the most beautiful and flavorful heirlooms. Deep purple-red skin with rich, smoky, complex flavor. Very productive for an heirloom. A garden showstopper.
Black Krim — dark, almost mahogany-colored fruits with rich, savory, complex flavor. Excellent producer and one of the more reliable heirlooms.
Green Zebra — chartreuse with darker green stripes when ripe. Bright, tangy flavor quite different from red tomatoes. Spectacular in salads.
Mortgage Lifter — developed by a West Virginia gardener who sold the plants to pay off his mortgage. Very large pink fruits with excellent flavor and better disease resistance than many heirlooms.
Best Cherry Tomatoes
Sun Gold — consistently rated among the most delicious tomatoes of any type. Orange cherry tomatoes with extraordinary sweetness and complex tropical flavor. Extremely productive. Once you’ve grown Sun Gold, you’ll grow it every year.
Sweet Million — very productive red cherry with excellent flavor. More disease resistant than many cherry varieties.
Black Cherry — deep purple-black cherries with rich, complex flavor. Beautiful in salads and on the vine.
Yellow Pear — small, pear-shaped yellow fruits with mild, sweet flavor. Very productive and a conversation piece in the garden.
Best Slicing Tomatoes
Early Girl — the reliable workhorse of home tomato growing. Medium-sized red fruits with good flavor, excellent reliability, and earlier production than most varieties. Perfect for shorter seasons.
Big Boy / Better Boy — large red slicing tomatoes with dependable production and good flavor. Better Boy adds improved disease resistance over Big Boy.
Celebrity — one of the most disease-resistant varieties available. Reliable, productive, and good-flavored. Excellent for beginning gardeners.
Best Paste Tomatoes for Cooking
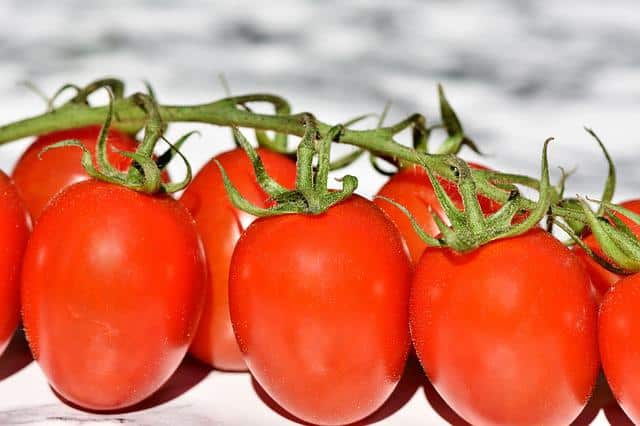
San Marzano — the Italian classic, beloved for its thick walls, small seed cavity, low moisture, and rich flavor that concentrates beautifully in cooking.
Roma — the most widely grown paste tomato. Reliable, productive, and makes excellent sauce.
Amish Paste — larger than Roma with outstanding flavor. One of the best paste tomatoes for home gardeners who want superior taste as well as cooking quality.
Starting Tomatoes from Seed
Starting tomatoes from seed opens up the full range of varieties — far more than any garden center will stock — and is genuinely satisfying. It requires a bit of setup but is very achievable for any dedicated gardener.
When to Start Tomato Seeds
Start tomato seeds indoors 6-8 weeks before your last frost date. This is important — start too early and you’ll have large, root-bound transplants that struggle; start too late and you lose valuable growing season. Calculate your last frost date (available from your local cooperative extension service) and count back 6-8 weeks.
What You Need for Seed Starting
- Seed starting trays or small pots (2-3 inch cells are ideal)
- Seed starting mix (not regular potting soil — seed starting mix is finer and more sterile)
- Seeds
- A warm location or heat mat (tomato seeds germinate best at 70-80°F)
- Grow lights or a very bright, south-facing window
The Seed Starting Process
Step 1: Fill containers with moist seed starting mix. Don’t use garden soil — it compacts and may harbor disease.
Step 2: Sow seeds about ¼ inch deep — two seeds per cell to ensure germination. You’ll thin to one seedling later.
Step 3: Keep warm and moist. Cover trays with plastic wrap or a humidity dome to retain moisture. Place on a heat mat or in a warm location. Tomato seeds don’t need light to germinate — they need warmth.
Step 4: Watch for germination — typically 5-10 days at optimal temperature. As soon as seedlings emerge, remove the cover and move to bright light immediately. Seedlings that don’t get enough light immediately after germination become pale, leggy, and weak.
Step 5: Provide maximum light. Tomato seedlings are light-hungry. A south-facing window provides some light but a grow light positioned 2-4 inches above seedlings produces dramatically better, stockier plants.
Step 6: Water carefully. Keep the mix consistently moist but not waterlogged. Water from below by placing trays in a shallow container of water and allowing the mix to absorb moisture from the bottom — this reduces damping off disease.
Step 7: Thin to one plant per cell once seedlings have their first true leaves.
Step 8: Pot up into larger containers (4-inch pots) when plants are 3-4 inches tall and have their first true leaves.
Step 9: Harden off for 7-10 days before transplanting outdoors — gradually introducing plants to outdoor conditions by starting with an hour outside in a sheltered spot and increasing exposure daily.
Buying Tomato Transplants: What to Look For
If starting from seed isn’t for you, buying transplants from a garden center or farmers market is perfectly good — but not all transplants are equal.
Signs of a Good Transplant
- Stocky and compact — short internodes between leaves indicate the plant received adequate light. Avoid tall, leggy plants that were grown in poor light.
- Deep green color — pale or yellowish plants may be nutrient deficient or stressed
- No signs of disease — check for spots, lesions, or unusual markings on leaves
- No flowers or fruit yet — transplants that have already set flowers or fruit are overly mature and may suffer transplant shock. If you must buy a flowering plant, pinch off the flowers at transplanting.
- Healthy roots — if possible, check that roots are white and healthy, not brown and circling the pot
When to Buy
Buy transplants close to your planting time — tomatoes are warm-season plants that resent cold. Don’t buy in early spring if you’re not planting for several more weeks, unless you have space and light to keep them growing well.
Choosing the Perfect Location
Tomatoes are sun-hungry plants that will disappoint in anything less than a prime location.
Sunlight Requirements
Tomatoes need a minimum of 6 hours of direct sun daily — 8 hours is better, and more is fine. They will grow in less sun but production drops dramatically and disease problems increase. If you have a choice, give your tomatoes your sunniest spot.
Avoiding Problems with Location
Rotate your tomatoes. Don’t plant tomatoes (or other members of the nightshade family — peppers, eggplant, potatoes) in the same soil year after year. Soil-borne diseases like early blight and fusarium wilt build up in the soil and can devastate subsequent crops. Rotate to a different bed each year on at least a three-year cycle. DIY Organic Gardening: The Ultimate Beginner’s Guide
Good air circulation. Avoid crowding tomatoes against fences or structures in ways that restrict air flow around the plants. Good air circulation reduces fungal disease significantly.
Near water. Tomatoes need consistent, regular watering. Place them within easy reach of a water source.
Soil Preparation for Tomatoes
Tomatoes are heavy feeders that perform best in rich, well-drained, deeply prepared soil. Getting the soil right before planting pays dividends throughout the season.
Ideal Soil Conditions
Tomatoes prefer:
- pH 6.0-6.8 — slightly acidic. Test your soil and adjust with lime (to raise pH) or sulfur (to lower pH) if needed.
- Rich organic matter — work in 2-4 inches of quality compost before planting
- Good drainage — tomatoes do not tolerate waterlogged soil. Raised beds are ideal because they drain freely. [LINK: The Complete Guide to Raised Bed Gardening]
- Deep, loose soil — tomato roots can go 3 feet deep in ideal conditions. Deep, loose soil allows extensive root development that supports large, productive plants.
Pre-Planting Soil Amendments
Beyond compost, several amendments specifically benefit tomatoes:
Bone meal — worked into the planting hole, provides phosphorus for root development and early establishment
Calcium — critical for preventing blossom end rot. Ground limestone, gypsum, or crushed eggshells all provide calcium. Adding eggshells to your compost and working finished compost into tomato beds is an excellent long-term calcium strategy.
Kelp meal — provides trace minerals and growth-promoting compounds that support plant health
Planting Tomatoes: Step by Step
Proper planting technique makes a significant difference to tomato plant establishment and long-term performance.
When to Plant
Plant tomatoes outdoors only after your last frost date has passed and nighttime temperatures are consistently above 50°F. Tomatoes planted in cold soil are stressed and may never fully recover their potential. If you’re eager to plant early, use wall-o-waters or cloches to protect plants from cold temperatures.
The Deep Planting Technique
Tomatoes have a remarkable ability to grow roots along their buried stems. Plant tomatoes deeply — burying 2/3 of the stem underground — and the buried portion will develop into roots, creating a more extensive root system and a stronger, more productive plant.
For tall transplants, dig a trench rather than a deep hole and lay the plant in at an angle, with only the top few inches of leaves above ground. The stem will quickly straighten toward the sun and the buried portion will root vigorously.
Planting Steps
- Prepare the planting hole — dig deep (12-18 inches), work in compost and bone meal
- Remove lower leaves — strip all leaves that will be below ground after planting
- Plant deeply — place transplant so 2/3 of the stem is buried
- Water thoroughly — settle the soil around roots and eliminate air pockets
- Mulch immediately — apply 3-4 inches of straw or other organic mulch around the base, keeping mulch an inch away from the stem
- Install support — place cages, stakes, or trellis at planting time to avoid disturbing roots later
Spacing
Give tomatoes room to grow and breathe:
- Indeterminate varieties: 24-36 inches apart in rows 3-4 feet apart
- Determinate varieties: 18-24 inches apart
Crowded tomatoes have more disease problems and lower yields.
Supporting Your Tomato Plants
Without support, most tomato plants sprawl on the ground — increasing disease, pest damage, and making harvest difficult. Good support is essential for productive tomatoes.
Tomato Cages
Wire tomato cages are the most common support method and work well for determinate varieties and smaller indeterminate types. The key is using sturdy, large-diameter cages — the flimsy, narrow cages sold at most garden centers are completely inadequate for vigorous indeterminate plants. Make your own from heavy-gauge concrete reinforcing wire for superior strength and capacity.
Stakes
A single heavy stake (1-2 inch diameter, 6-8 feet tall) driven 12 inches into the ground at planting provides strong support for a single-stemmed indeterminate tomato trained to one main leader. Tie the main stem loosely to the stake as it grows using soft ties that won’t damage the stem.
The Florida Weave
For growing multiple plants in rows, the Florida weave — running horizontal strings alternately on either side of a row of plants between end posts — is efficient, economical, and very effective. Widely used by market gardeners.
Trellises and Arches
Indeterminate tomatoes trained to a trellis or grown through a garden arch are both highly productive and beautiful. Growing tomatoes vertically on a trellis maximizes air circulation, makes fruit easy to spot and harvest, and creates a dramatic visual statement in the garden. How to Build a DIY Garden Archway Construction Step-by-Step Guide
Watering Tomatoes Correctly
More tomato problems are caused by incorrect watering than almost any other factor. Getting watering right is one of the most important skills in tomato growing.
The Golden Rule: Consistency
Tomatoes need consistent, even moisture throughout the growing season. Irregular watering — periods of drought followed by heavy watering — causes a cascade of problems:
- Blossom end rot — dark, sunken spots on the bottom of fruit caused by calcium uptake disruption resulting from inconsistent moisture
- Fruit cracking — rapid water uptake after dry periods causes fruit to expand too quickly and split
- Reduced flavor — water-stressed plants produce less flavorful fruit
How Much and How Often
Tomatoes typically need 1-2 inches of water per week, more during hot weather and periods of heavy fruit production. The best approach is to water deeply and infrequently — thoroughly soaking the root zone every 2-3 days — rather than shallowly every day.
Best Watering Methods
Drip irrigation is the ideal watering system for tomatoes. Water delivered directly to the root zone keeps foliage dry (reducing disease), minimizes evaporation, and can be automated for consistent delivery.
Soaker hoses are an excellent and affordable alternative to drip systems. Laid along the base of plants and covered with mulch, soaker hoses deliver water slowly and directly to the root zone.
Avoid overhead watering — wet foliage is an invitation to fungal diseases including early blight and late blight. If you must use overhead watering, water early in the morning so foliage dries during the day.
The Importance of Mulching
A thick mulch layer (3-4 inches of straw, wood chips, or shredded leaves) is one of the most effective ways to maintain consistent soil moisture for tomatoes. Mulch slows evaporation dramatically, moderates soil temperature, and reduces the frequency of watering needed. It also prevents soil splash onto lower leaves during watering — a significant source of early blight infection.
Feeding Your Tomato Plants
Tomatoes are heavy feeders that benefit from regular nutrition throughout their long growing season — but feeding them incorrectly is as damaging as not feeding them at all.
The Nitrogen Balance
The biggest feeding mistake tomato growers make is over-applying nitrogen. Too much nitrogen produces lush, dark green plants with spectacular foliage and very little fruit. Tomatoes need balanced nutrition — adequate nitrogen for healthy growth, but not so much that it comes at the expense of fruit production.
A Feeding Program for Tomatoes
At planting: Work generous compost and bone meal into the planting hole. This provides moderate, balanced nutrition for early establishment.
First feeding (3-4 weeks after transplanting): Apply a balanced organic fertilizer or compost tea. At this stage the plant is establishing and needs moderate nitrogen for growth.
At first flower: Switch to a lower-nitrogen, higher-potassium fertilizer to encourage fruiting rather than vegetative growth. Liquid seaweed, comfrey tea, or a tomato-specific organic fertilizer all work well.
Through fruit production: Continue feeding every 2-3 weeks with potassium-rich fertilizer. Heavy-producing plants are drawing significant nutrients from the soil and benefit from regular supplementation.
Calcium supplementation: To prevent blossom end rot, ensure adequate calcium availability throughout the season. Foliar sprays of calcium chloride, additions of agricultural lime or gypsum to the soil, and consistent watering (which enables calcium uptake) all help.
Pruning and Training Tomatoes
Pruning is controversial among tomato growers — some swear by it, others never prune and produce fine crops. The truth is that pruning is most beneficial for indeterminate varieties grown in limited space, in humid climates where air circulation matters, or when you’re optimizing for large fruit over total yield.
Understanding Suckers
Suckers are shoots that emerge from the crotch between the main stem and a branch. Left to grow, they become full branches — potentially turning a single-stemmed plant into a sprawling multi-stemmed bush. Removing suckers (called “suckering” or “side-shooting”) keeps plants more manageable, improves air circulation, and directs the plant’s energy into fewer, larger fruits.
When to Prune and When Not To
Prune indeterminate varieties when growing in cages or on stakes and you want manageable plants with large fruits. Remove suckers below the first flower cluster regularly throughout the season.
Consider not pruning if you’re growing in a large cage or trellis with plenty of space, in a dry climate where disease pressure is low, or if you prioritize total yield over individual fruit size.
Don’t prune determinate varieties — their growth is already genetically limited and removing suckers reduces yield without the compensating benefit of better size.
The Single Leader Method
The most intensive pruning approach — removing all suckers to maintain a single main stem trained vertically — produces the most manageable plant and the largest individual fruits. It requires consistent attention (suckers need removing weekly during the growing season) but is the preferred method for serious tomato growers seeking quality over quantity.
Common Tomato Pests and Diseases
Knowing what problems to watch for and catching them early makes the difference between a minor setback and a crop failure.
Tomato Hornworm
The tomato hornworm is one of the most dramatic tomato pests — a large, bright green caterpillar up to 4 inches long that can defoliate a plant surprisingly quickly. They’re masters of camouflage against green foliage but the damage they cause (large irregular holes in leaves, stripped stems) is obvious.
Control: Hand pick — hornworms are large enough to find and remove manually. Bacillus thuringiensis (Bt) spray is highly effective and safe. Encourage parasitic wasps that lay eggs on hornworms (white cocoons on the hornworm’s back indicate parasitized individuals — leave these to develop).
Aphids
Tiny soft-bodied insects that cluster on growing tips and leaf undersides, sucking sap and potentially spreading disease. A strong blast of water removes them effectively. Insecticidal soap spray controls established populations. Encourage ladybugs and other natural predators.
Early Blight
One of the most common tomato diseases — brown spots with concentric rings (like a target) on lower leaves, spreading upward through the plant. Caused by a fungal pathogen that overwinters in soil and splashes onto lower leaves during watering.
Prevention: Mulch heavily to prevent soil splash. Remove lower leaves to 12 inches. Avoid overhead watering. Rotate crops. Treatment: Remove affected leaves. Apply copper fungicide preventively during humid periods.
Late Blight
The same disease that caused the Irish potato famine — more serious than early blight and capable of destroying a crop within days in favorable conditions. Dark, water-soaked lesions on leaves and fruit, often with white fuzzy growth on the underside of leaves.
Prevention: Choose resistant varieties. Avoid overhead watering. Maximize air circulation. Treatment: At first sign, remove affected material and apply copper fungicide. In severe cases, the plant may be beyond saving.
Blossom End Rot
Dark, sunken, leathery patches on the bottom of fruit — not caused by a pathogen but by calcium deficiency resulting from inconsistent watering. Improve watering consistency and ensure adequate calcium in the soil. Affected fruit is safe to eat — simply cut off the affected portion.
Fusarium and Verticillium Wilt
Soil-borne fungal diseases that block water uptake, causing wilting that doesn’t recover with watering. No cure — prevention through crop rotation and choosing resistant varieties (look for V and F resistance designations on seed packets) is essential.
Harvesting and Storing Tomatoes
Knowing when and how to harvest, and what to do with an abundant crop, is the final piece of the tomato-growing puzzle.
When to Harvest
The best time to harvest a tomato depends on your climate and how you plan to use it. In a warm climate with no imminent frost risk, leave tomatoes on the vine until fully ripe — this is when flavor is at its absolute peak. A fully vine-ripened tomato eaten within hours of picking is the pinnacle of the tomato experience.
In climates where frost threatens before all fruit ripens, harvest tomatoes at the “breaker” stage — when they’ve changed from fully green to showing the first blush of color. They will ripen off the vine at room temperature with very good (though not quite equal) flavor compared to vine-ripened fruit.
How to Harvest
Twist the tomato gently — if it releases easily with a gentle turn, it’s ready. If it resists, give it another day or two. Use scissors or pruning snips for paste tomatoes to avoid pulling stems.
Harvest regularly — fruit left on the vine past peak ripeness can split, rot, or reduce the plant’s further production. Regular picking encourages continued fruit set.
Storing Fresh Tomatoes
Never refrigerate fresh tomatoes. Cold temperatures destroy the volatile compounds responsible for tomato flavor, turning even the best homegrown tomato mealy and tasteless. Store at room temperature, out of direct sunlight, stem side up.
Fresh ripe tomatoes at room temperature will keep for 3-5 days. For longer storage, tomatoes at the breaker stage can be kept at room temperature for 1-2 weeks as they complete ripening.
Preserving a Surplus
When your tomato plants hit peak production, you may find yourself with more tomatoes than you can possibly eat fresh. Fortunately, tomatoes preserve beautifully:
Sauce and passata — the classic preservation method. Roasted or simmered tomatoes pureed and canned or frozen provide summer flavor throughout the year.
Roasted tomatoes — halved tomatoes roasted in olive oil until concentrated and slightly caramelized, then frozen, are one of the most useful pantry staples you can make.
Sun-dried tomatoes — dried in a low oven or food dehydrator, then packed in olive oil. Intensely flavored and versatile.
Whole frozen tomatoes — the laziest preservation method and remarkably effective. Freeze tomatoes whole on a tray, then bag them. Thawed frozen tomatoes are excellent in cooked applications.
Growing Tomatoes in Raised Beds and Containers
Raised beds and containers are actually excellent environments for tomatoes — in some respects better than in-ground growing.
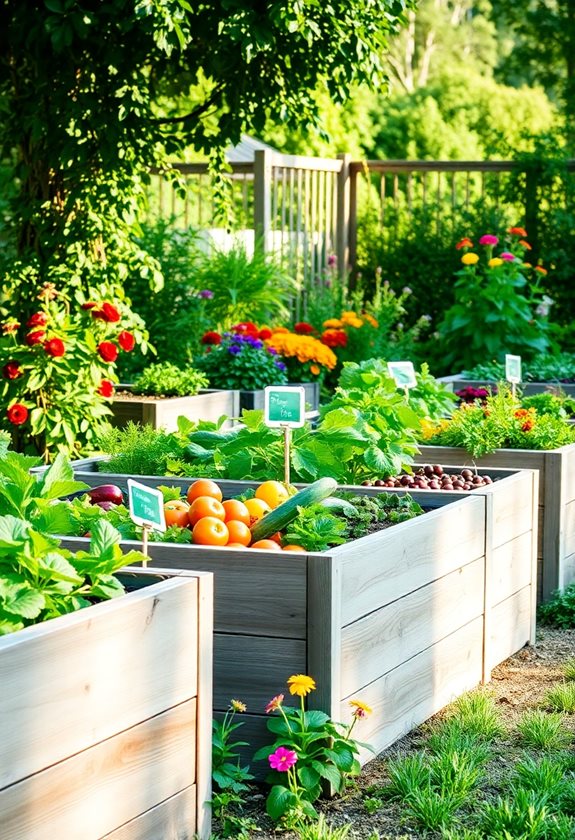
Tomatoes in Raised Beds
Raised beds offer tomatoes several advantages: the deep, loose, well-draining soil that tomato roots love; soil that warms quickly in spring for earlier planting; and easier management of soil quality and rotation. A well-built raised bed filled with quality soil mix produces exceptional tomatoes. For more information, check this out: The Complete Guide to Raised Bed Gardening
For raised bed tomatoes:
- Use beds at least 12 inches deep — 18 inches is better for the deepest root development
- Plant one indeterminate tomato per 4 square feet of bed space
- Install tall, sturdy support at planting
- Water more frequently than in-ground plants — raised beds drain more freely
Tomatoes in Containers
Container tomatoes are a viable option for gardeners without ground space — balconies, patios, and small yards can all support productive tomato plants in pots.
Container selection:
- Minimum 5-gallon container for determinate varieties
- 10-15 gallon for indeterminate varieties
- Fabric grow bags are excellent — they air-prune roots and prevent overwatering
Container tomato care:
- Water frequently — containers dry out much faster than ground soil, sometimes needing daily watering in hot weather
- Feed regularly — container plants exhaust nutrients quickly and need more frequent fertilization than ground-planted tomatoes
- Choose appropriate varieties — determinate and compact indeterminate varieties (Tumbling Tom, Patio, Bush Early Girl) are better suited to containers than large indeterminate types
Pro Tips for a Record Tomato Harvest
Plant deeply every time. The deep planting technique — burying 2/3 of the stem — is one of the highest-return practices in tomato growing. More roots equals a stronger, more productive plant. Do it every year without exception.
Mulch immediately after planting. A thick mulch layer applied at planting moderates soil temperature, retains moisture, prevents soil splash (and the early blight it causes), and suppresses weeds. It’s one of the most impactful things you can do at planting time.
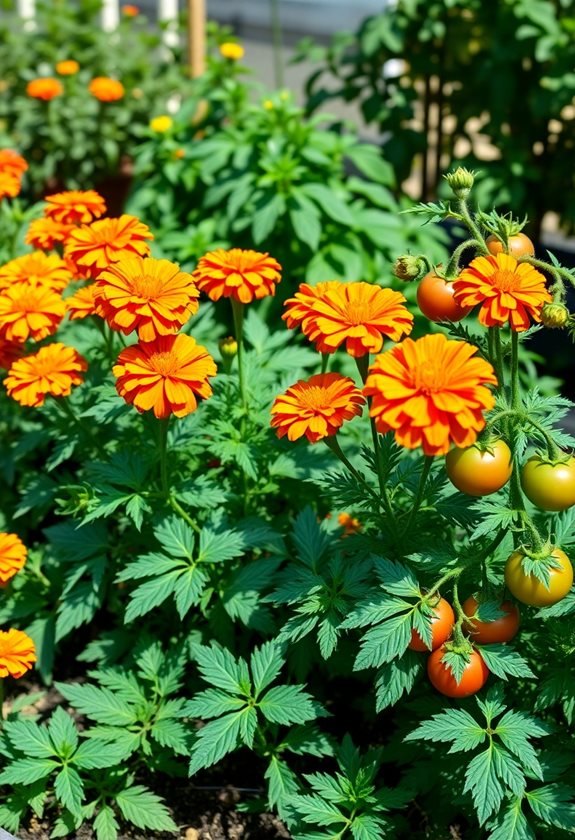
Plant companion herbs. Basil planted around tomatoes is beautiful, practical, and may help deter certain pests. Marigolds are excellent companions that deter nematodes and attract beneficial insects. Borage attracts pollinators and is said to improve tomato flavor.
Pinch off early flowers on transplants. This feels counterintuitive but pinching off the first flower clusters on recently transplanted tomatoes directs the plant’s energy into root and vegetative establishment rather than fruit production, resulting in larger, more productive plants later in the season.
Keep a variety journal. Growing multiple varieties every year and noting which ones you loved — for flavor, productivity, disease resistance, and beauty — allows you to gradually refine your selection toward the varieties that perform best in your specific garden and climate.
Save seeds from your best plants. Heirloom tomato seeds are easily saved — allow one perfect fruit from your best plant to fully ripen until almost overripe, ferment the seeds in water for a few days to remove the gel coating, rinse, dry thoroughly, and store in a cool, dark place. Saved seeds are free and you can select over time for the characteristics that matter most to you.
Don’t fear imperfect fruit. Many of the most flavorful heirloom varieties produce cracked, split, irregularly shaped fruit that would never pass commercial grading standards. These imperfections don’t affect flavor — often the cracked, gnarly, ugly tomato is the most delicious one in the basket.
Frequently Asked Questions
When should I plant tomatoes outdoors? After your last frost date, when nighttime temperatures are consistently above 50°F. Planting in cold soil stresses tomatoes and sets them back significantly. Wait for genuinely warm soil — patient planting beats eager early planting every time.
How many tomato plants do I need to feed a family? For fresh eating, two to four indeterminate plants per person provides generous fresh tomatoes throughout the season. If you want to preserve sauce or make paste, add two to four determinate paste tomato plants. A family of four growing 8-12 plants will have fresh tomatoes in abundance plus enough surplus to preserve.
Why are my tomato leaves curling? Leaf curl has several causes: physiological leaf roll (normal response to heat or water stress — lower leaves curl upward on hot afternoons, uncurl in the morning), inconsistent watering, virus, or herbicide drift. If curling is accompanied by other symptoms (mottled color, stunted growth), investigate disease or herbicide damage. If plants otherwise appear healthy, physiological roll is most likely.
Why aren’t my tomatoes turning red? Tomatoes need warmth to ripen — temperatures above 85°F actually slow or prevent lycopene (red pigment) production. In very hot summers, tomatoes may remain orange or yellow-orange even when fully ripe. They’re still delicious — harvest when they give slightly to gentle pressure regardless of color.
How do I get rid of blossom end rot? Improve watering consistency — blossom end rot is almost always a calcium uptake problem caused by irregular moisture rather than a lack of calcium in the soil. Mulch heavily, water consistently and deeply, and avoid large fluctuations between wet and dry conditions. Foliar calcium sprays can help once you’ve corrected the watering.
Can I grow tomatoes in partial shade? You can, but production will be significantly reduced and disease problems increase in shaded conditions. If partial shade is unavoidable, choose cherry tomato varieties which tend to be more tolerant of reduced light than large-fruited types, and accept lower yield.
What’s the white stuff on my tomato leaves? Most likely powdery mildew — a fungal disease that appears as white powdery coating on leaf surfaces, typically in late summer. Improve air circulation, remove affected leaves, and apply a diluted baking soda spray (1 tablespoon per gallon of water with a drop of dish soap) for mild cases. Neem oil is effective for more severe infections.
Should I remove tomato leaves at the bottom of the plant? Yes — removing the lower leaves to about 12-18 inches above the soil surface is one of the most effective early blight prevention strategies. Lower leaves are most vulnerable to soil-splash infection, the most common source of early blight. Remove them gradually rather than all at once, and do it on a dry day so cut surfaces can dry quickly.
Growing great tomatoes is one of the most rewarding skills in the gardening world — one that improves year by year as you learn your varieties, your soil, and your climate. The first time you bite into a fully vine-ripened tomato from your own garden, you’ll understand why so many gardeners say this single plant is what made them fall in love with growing their own food. Start with a few reliable varieties, give them the sun and rich soil they crave, water consistently, and get ready to be spoiled for supermarket tomatoes forever. 🍅
Have a tomato question we didn’t cover? Leave it in the comments — we’d love to help you grow your best crop yet!
Related Articles: