
Building a garden trellis can transform your backyard! Start by gathering sturdy wood, tools, and safety gear. Pick a sunny spot—6-8 hours is ideal—and design your trellis like a piece of garden art. Measure and cut your wood carefully (remember: measure twice, cut once!). Assemble the frame snugly, securing corners tightly. Finally, add supports for your climbing plants. It’s not just a project; it’s a chance to create something beautiful! Curious about more tips?
Design Highlights
- Gather sturdy materials like cedar or pine, along with essential tools such as nails, a hammer, and safety gear like gloves and goggles.
- Choose a location with 6-8 hours of sunlight, ensuring it is sheltered from strong winds and easily accessible for maintenance.
- Design your trellis creatively, considering shapes that complement your garden and using safe materials like untreated wood or sturdy metal.
- Cut the wood carefully, following the measure twice, cut once principle, and wearing safety goggles and gloves for protection.
- Assemble the frame by securing corners with screws, using wood glue for stability, and adding diagonal braces for extra support.
Gather Your Materials
Gathering your materials is like gearing up for an adventure in your backyard—exciting and a little chaotic, right? You’ll need sturdy wood (like cedar or pine), nails or screws, and a hammer or drill. Don’t forget about safety gear! Grab gloves and goggles to protect yourself. You might want some twine or wire for your climbing plants, too. Oh, and a measuring tape guarantees everything fits just right! Before you jump in, double-check your list. Trust me, forgetting an essential item can turn your garden dreams into a scavenger hunt. To enhance your project, consider adding beautiful trellises that can elevate the overall look of your garden. Ready to transform your space? Let’s get started!
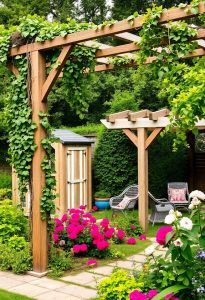
Choose the Right Location
Choosing the right location for your garden trellis is like picking the perfect spot for a picnic—it’s all about the vibe! You want your trellis to thrive, so look for a spot with plenty of sunlight, ideally six to eight hours a day. Avoid areas with strong winds or falling debris; safety first! Think about accessibility, too—can you easily reach it for watering and maintenance? Finally, consider your plants’ needs. Will they climb high or spread wide? Imagine this: a cozy corner filled with beautiful blooms and sturdy vines. A well-placed trellis can maximize planting space and create an inviting atmosphere. Doesn’t that sound inviting? Happy trellising!
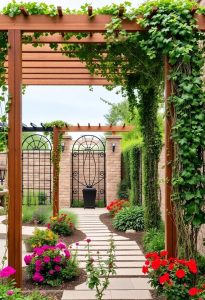
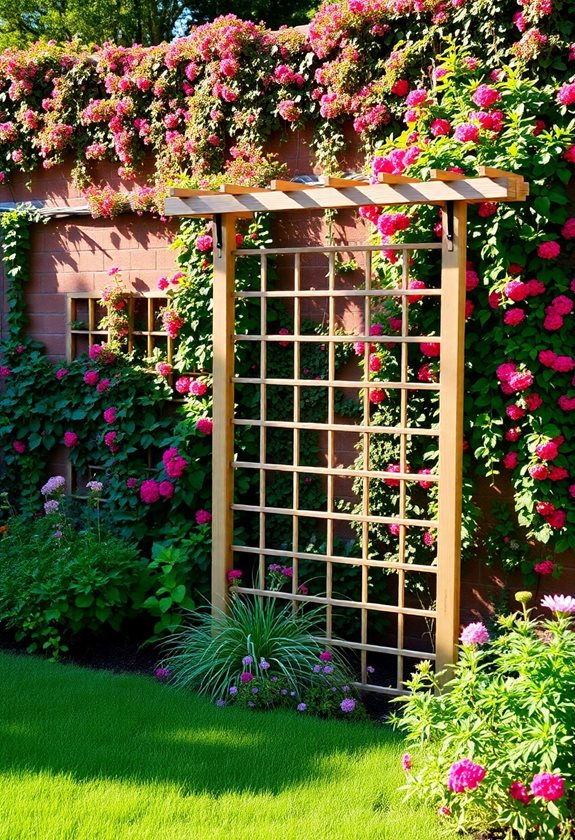
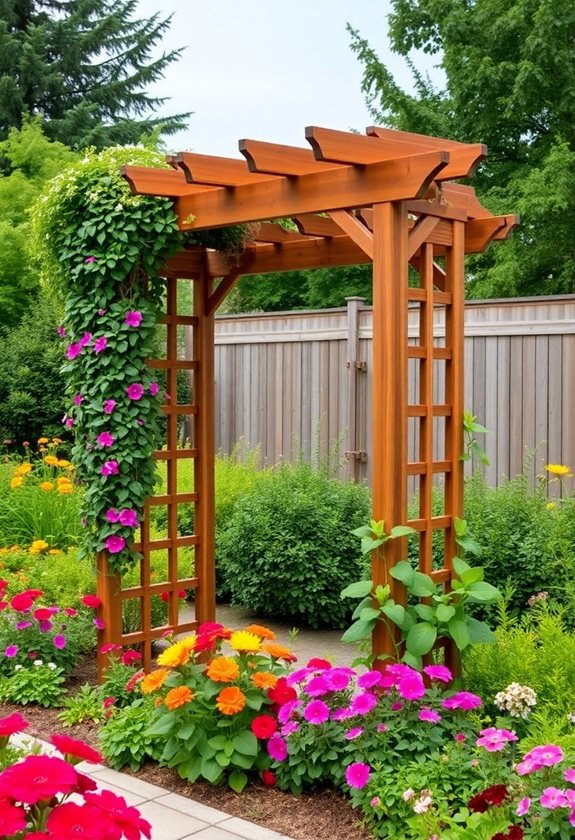
Design Your Trellis
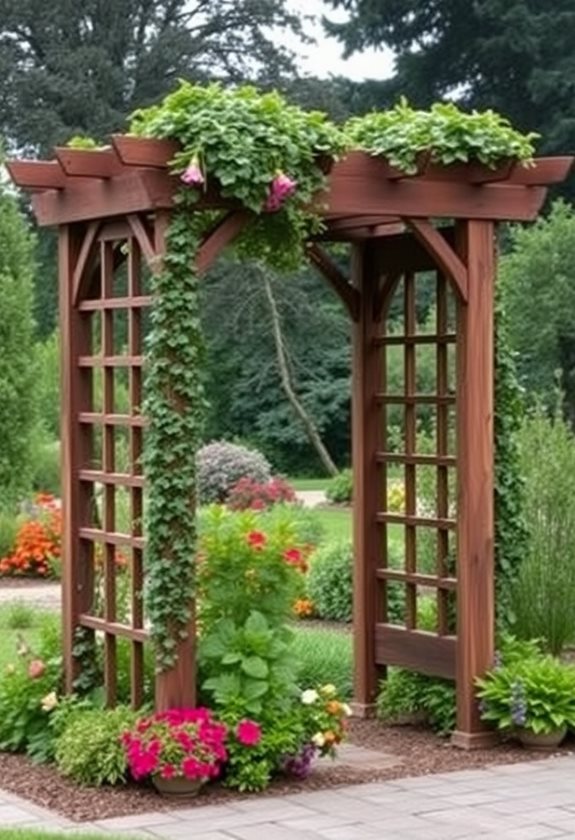
When it comes to designing your trellis, think of it as creating a piece of art that also serves a purpose—after all, who wouldn’t want a stunning backdrop for their garden? Start by considering shapes and sizes that fit your space. Do you want a simple A-frame or a more elaborate arch? Sketch it out; it doesn’t have to be perfect! Use safe materials, like untreated wood or sturdy metal, to guarantee longevity. Remember, your design can reflect your personality—add fun elements like hooks for hanging plants or a whimsical paint color. Additionally, consider incorporating stunning arbors and trellises which can enhance the overall beauty of your garden. Which style speaks to you? Let your creativity bloom!
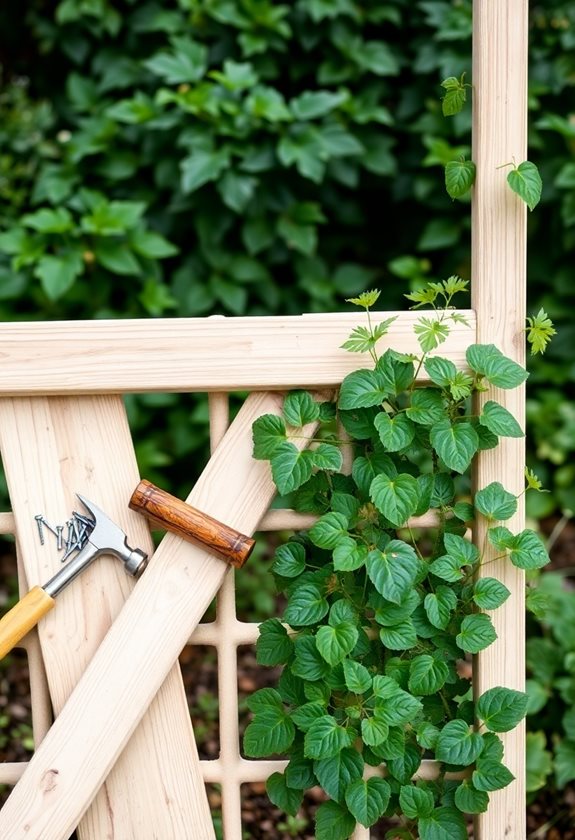
Cut the Wood
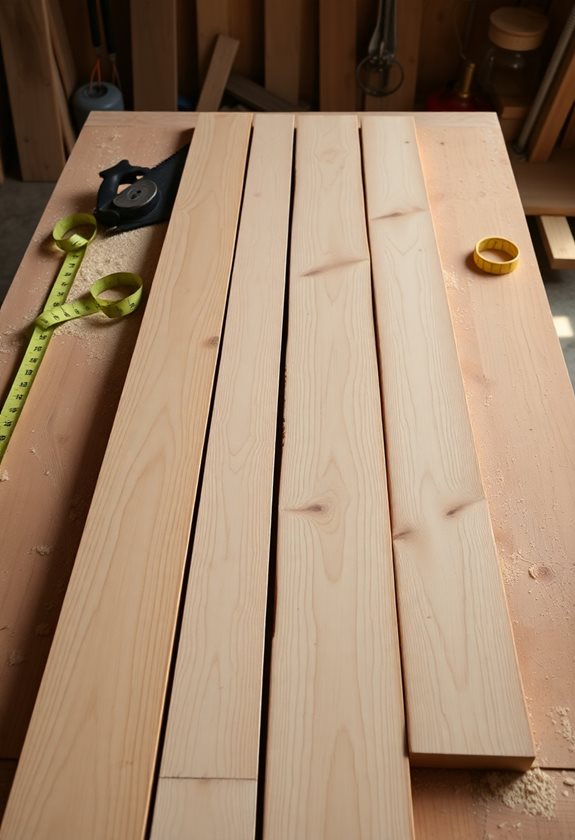
Before you plunge into cutting the wood for your trellis, let’s take a moment to appreciate the thrill of turning your design into reality! Grab your safety goggles and gloves—safety first! Measure twice, cut once; it’s a mantra for a reason. Use a sharp saw for clean cuts, and remember to keep your fingers clear of the blade.
Before cutting your trellis wood, ensure safety with goggles and gloves—measure twice and cut once for perfect pieces!
Here’s a tip: if you’re nervous, practice on scrap wood! Additionally, consider using DIY archway designs to inspire your trellis layout.
- Mark your cuts clearly
- Hold the wood steady
- Cut along the line
Trust me, the satisfaction of those perfect pieces will make your gardening heart sing! Ready? Let’s get cutting!
Assemble the Frame

Now that you’ve got those perfect pieces of wood cut and ready to go, it’s time to bring your trellis vision to life by assembling the frame! Start by laying the wood pieces flat, making sure everything fits snugly. Use wood glue for extra hold—trust me, it’ll save you from future headaches! Next, secure the corners with screws, ensuring they’re tight but not overdone. Remember, safety first: wear goggles to protect your eyes. If you’re feeling adventurous, add diagonal braces for extra support! Stability concerns can be mitigated by ensuring your frame is well-constructed. Isn’t it exciting to see your creation take shape? Keep going; you’re almost there!
Secure the Trellis
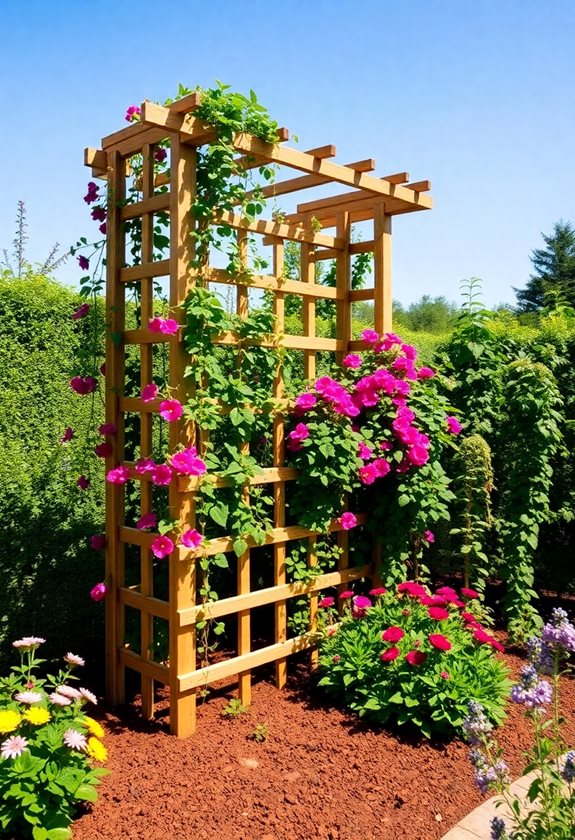
Securing your trellis is an essential step that can make all the difference in how well it stands up to the elements and supports your climbing plants. You wouldn’t want your hard work to topple in a storm, right? Start by anchoring your trellis firmly in the ground. Use stakes or concrete for extra stability. Consider checking the weather before planting; a windy day might not be ideal for setup! Don’t forget to guarantee it’s level—nobody likes a wonky trellis! By taking these precautions, you’ll protect your plants and enjoy the beauty of your garden for years to come. Additionally, choosing the right type of support can significantly improve the growth and health of your climbing plants. Happy gardening!
Add Plant Supports
Transform your trellis into a thriving support system for your climbing plants! Adding plant supports is essential for keeping your garden looking neat and healthy. Here are a few simple options that can help:
- Twine or String: Tightly secure twine from the trellis to your plants to guide them upward.
- Wire Mesh: Install wire mesh for a sturdy, flexible support that works wonders for heavier vines.
- Plant Clips: Use clips to fasten your plants gently, ensuring they grow in the right direction.
- Bamboo Stakes: Stick these in the ground for extra support—perfect for larger plants!
Incorporating ergonomic tools can make adding these supports easier on your hands and back.
Happy gardening!
Frequently Asked Questions
What Types of Plants Are Best for Climbing on a Trellis?
When it comes to climbing plants, you’re really in for a treat! You’ll want to pick varieties that thrive and create a stunning display. Consider these fantastic options:
- Clematis: Beautiful flowers that’ll make your heart sing!
- Sweet Peas: Their fragrance is a refreshing change.
- Beans: They’re not just tasty; they climb like pros!
Just remember, a little care goes a long way, so stay attentive! What will you choose?
How Long Will My Trellis Last With Proper Care?
If you take proper care of your trellis, it can last for years! Regular maintenance, like checking for rust or rot, really makes a difference. Here’s what you can do:
- Clean it to prevent dirt buildup.
- Apply weatherproofing if it’s wooden.
- Inspect for damage after storms.
Think of it as a relationship; the more you nurture it, the longer it’ll stand strong. Isn’t it great to have something durable in your garden?
Can I Paint or Stain My Trellis?
Absolutely, you can paint or stain your trellis! Just imagine it standing out in your garden, vibrant and full of personality. But before you grab that brush, consider using non-toxic paints or stains to keep your plants safe. Start with a clean surface, apply a primer if necessary, and don’t forget to let it dry completely. Choosing a color that complements your garden can add a lovely touch. What color will you choose?
What Tools Do I Need for Maintenance?
For maintaining your garden trellis, you’ll need a few essential tools! Grab a pair of sturdy gloves to protect your hands and a good pair of pruning shears for any overgrown vines. A paintbrush can help you touch up any paint or stain, while a small ladder will give you easy access to higher spots. Don’t forget a measuring tape to guarantee everything stays in place—because who wants a lopsided trellis, right? Happy gardening!
Is It Okay to Use Recycled Materials for My Trellis?
Absolutely, using recycled materials for your trellis can be a fantastic choice! Think about the thrill of transforming old pallets or leftover wood into something beautiful. Just make sure those materials are safe—no toxic substances or sharp edges. You wouldn’t want your plants or yourself getting hurt, right? Plus, it’s eco-friendly and adds character to your garden! Have fun with it, and let your creativity blossom as you build! 🌿