Want to create personalized garden stepping stones? It’s super easy! First, gather your materials like concrete mix and molds—bonus points for creativity! Then, prepare the molds with a non-stick spray, mix the concrete (don’t forget your gloves!), and pour it in. Personalize with names or fun decorations—let your imagination run wild! Finally, let them cure for 24-48 hours. Who knew making garden art could be this fun? Stick around for more tips and tricks!
Design Highlights
- Gather all necessary materials, including concrete mix, molds, and decorative items for personalization.
- Prepare molds by cleaning them and applying a non-stick spray for easy release.
- Mix the concrete according to package instructions, ensuring a smooth consistency before pouring.
- Personalize stones with names, quotes, or decorative items, and let creativity shine.
- Allow stones to cure for 24-48 hours before checking for firmness and avoiding stress until fully set.
Gather Your Materials
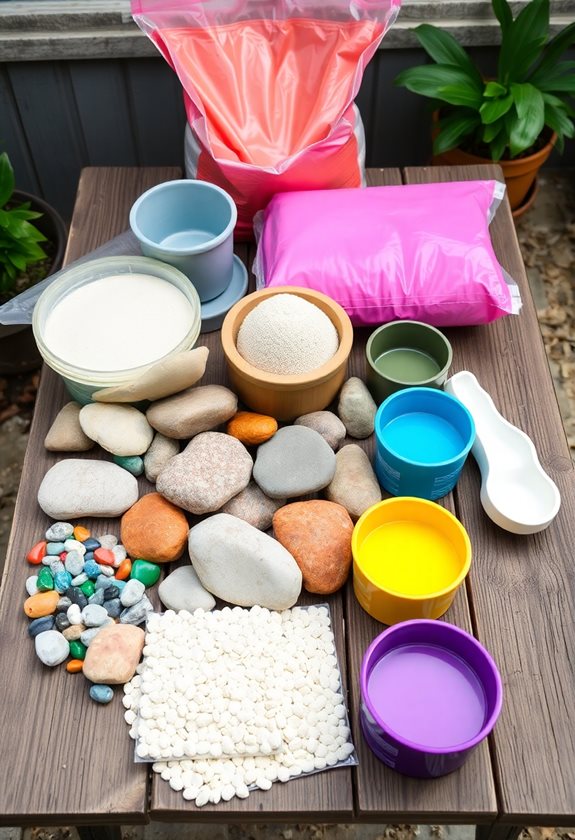
Before you plunge into creating your own garden stepping stones, you’ll want to gather your materials—trust me, it makes the whole process a lot smoother! Start with concrete mix, a bucket, and water. Don’t forget gloves; safety’s key! You’ll also need molds—think plastic containers or silicone for easy release. If you’re feeling creative, grab some decorative items like pebbles or tiles to personalize your stones. And hey, a trowel can help you smooth out the concrete. Additionally, making personalized stones allows you to showcase your unique style in your garden. So, are you ready? The joy of crafting your own garden path awaits! Let’s get started on this fun adventure together!
Prepare the Molds

Getting your molds ready is a crucial step in your stepping stone adventure, and trust me, it can make or break your project! First, choose molds that suit your style—plastic, silicone, or metal can all work. Clean them thoroughly to guarantee no dirt or residue interferes with your stones. Next, consider applying a non-stick spray or oil; this’ll help release your stones without a hitch! If you’re feeling creative, add unique textures or patterns inside the mold. Remember, safety first—wear gloves to protect your hands from any residue. Additionally, using unique DIY stepping stone designs can inspire you to create something truly special for your garden. Ready? Let’s get those molds prepped for your beautiful garden stones!
Mix the Concrete
Now that your molds are all set, it’s time to mix the concrete! This step is essential, so let’s do it safely and effectively. Here’s how:
- Wear gloves to protect your hands.
- Use a mask to avoid inhaling any dust.
- Follow the instructions on the concrete package for the right water-to-concrete ratio.
- Stir thoroughly until you achieve a smooth consistency.
Once you’ve mixed it, you’ll feel that rush of excitement! Just remember, don’t rush—taking your time guarantees a solid final product. Additionally, ensure your garden features like garden waterfalls can enhance the overall aesthetic of your outdoor space. Ready to pour? Let’s get those stepping stones made!
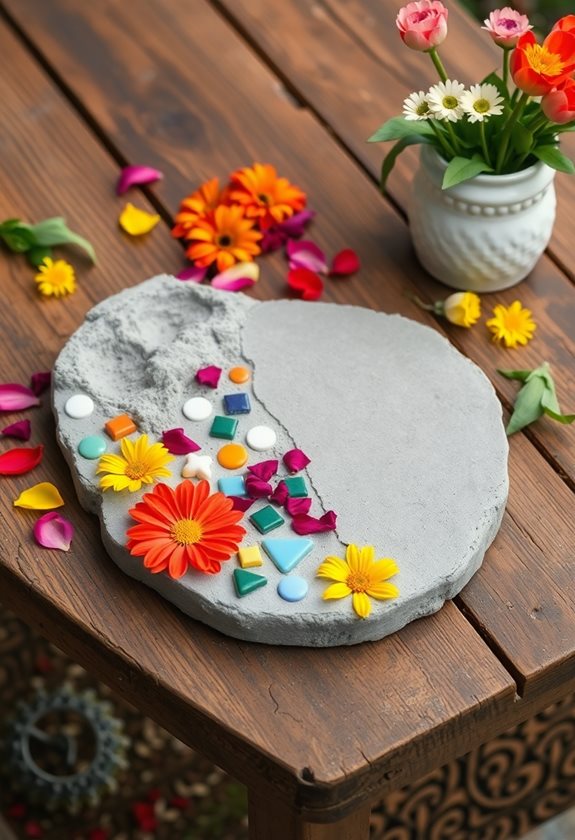
Personalize Your Stones
While you might think stepping stones are just functional, personalizing them can transform them into unique expressions of your creativity! Why not add your name, favorite quote, or even handprints? Use colorful mosaic tiles, pebbles, or leaves embedded in the concrete for a fun touch!
Personalize your stepping stones with your name, favorite quote, or vibrant designs to express your creativity!
Here are some ideas:
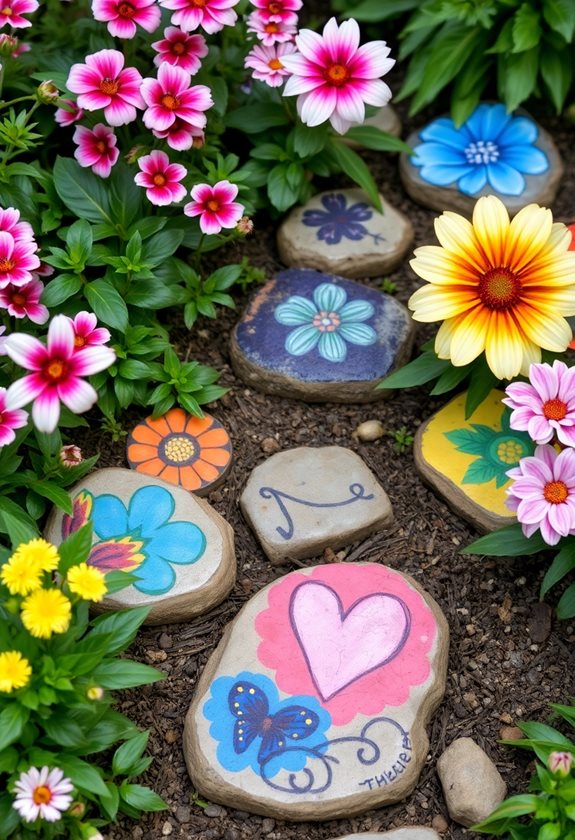
- Paint designs with outdoor-safe paint.
- Incorporate your favorite colors.
- Add meaningful symbols, like hearts or stars.
As you create, just remember to wear gloves for safety. Embrace your imagination—each stone can tell a story! You can also consider using natural stones for an eco-friendly option that enhances your garden’s aesthetic. Ready to make your garden reflect you? Let’s get personal!
Allow to Cure and Set
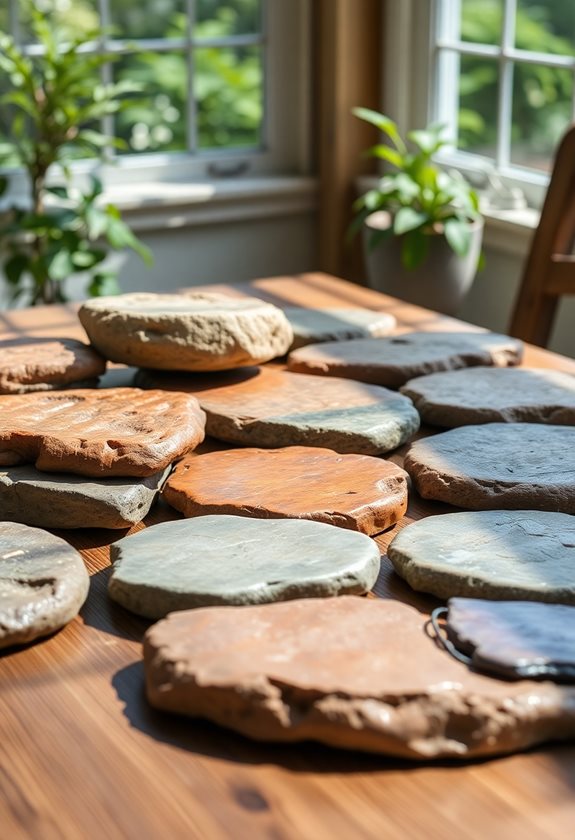
After you’ve personalized your stones and added your creative flair, it’s time to let them have their moment to shine! Curing and setting are essential steps, ensuring your stones are durable and safe for outdoor use. Here’s what you need to do:
- Cover them with plastic to retain moisture.
- Leave in a cool, dry place for at least 24-48 hours.
- Check for firmness by gently pressing the surface.
- Avoid jumping on them until fully cured (about a week!).
Additionally, using high-quality materials can enhance the longevity of your stones, making them a perfect addition to your backyard DIY stepping stone projects.
Patience pays off! Your beautiful creations will be ready to grace your garden, bringing joy and personality to your space!
Frequently Asked Questions
Can I Use Colored Concrete for My Stepping Stones?
Absolutely, you can use colored concrete for your stepping stones! It’s like giving your garden a vibrant makeover! Just make sure to choose non-toxic dyes for safety, especially if you have pets or kids. Mixing in color can be fun, but remember to follow the manufacturer’s guidelines for the best results. Have you thought about creating patterns? Colorful stones can truly elevate your garden’s charm—who wouldn’t want that? Let your creativity shine!
How Long Will the Stones Last Outdoors?
Your stepping stones can last for years outdoors if you use the right materials and techniques! Typically, they endure well under various weather conditions, but a few factors play a role. Consider:
- Quality of concrete: Higher quality means more durability.
- Weather protection: Sealants can shield against moisture and extreme temperatures.
- Thickness: Thicker stones are less likely to crack.
What Tools Do I Need for This Project?
To tackle this fun project, you’ll need a few essential tools! Grab a mixing container, a trowel for spreading, and some sturdy gloves to keep your hands safe. A mold can be anything from a plastic tray to a cake pan—get creative! Don’t forget a measuring cup for precise mixing. And if you want to personalize those stones, grab some paints or decorations. Ready to jump in? Let’s make something beautiful together!
Can I Add Glitter or Paint to the Stones?
Absolutely, you can add glitter or paint to your stones! Just make sure you use non-toxic options, so it’s safe for your garden. Mix in some glitter right before the concrete sets, or paint designs once it’s dry. Imagine the sparkle in the sunlight! Have fun experimenting, but remember, a little goes a long way—too much can look messy. So, ready to add some flair to your garden? Let’s get creative!
How Should I Store Leftover Concrete Mix?
Storing surplus concrete can be tricky, but it’s totally doable! First, seal the leftover mix tightly in a plastic container—make sure it’s moisture-proof to prevent premature hardening. Second, keep it in a cool, dry place. Have you thought about labeling the container with the date? That way, you’ll remember when it’s best used. If you’ve got a little humor in your garden, just think of it as concrete waiting for its comeback!